When people think of pediatric occupational therapy, handwriting is often one of the first things that come to mind. I believe this popularity was developed by others observing how occupational therapists help children at school with their academic needs and, as we all know, handwriting is a very prominent academic skill for our early learners. Since this tends to be an area of interest, I wanted to give you my favorite tips and tricks for handwriting skill development at home.
When should my child be writing?
For children not yet in Kinder, your focus should be on developing pre-writing skills. This means developing appropriate hand strength, grasping skills, pre-writing shape drawing, visual skills, etc. Here are some activity ideas for children 4 years old and under:
Play-doh: There are endless possibilities with this medium. It’s great for hand strength, tactile input, and motor planning. Something as simple as pulling the play-doh out of the container and forming different shapes helps build intrinsic (muscles inside the hand) hand strength. Encourage pinching off various sizes of play-doh. You can even add a sorting activity to this (ex. Should that piece go in the big or small pile?). Roll the play-doh into various shapes. Use cookie cutters to encourage more strength, spatial awareness, motor planning, and problem solving (all of which you need for writing!).
Dot Markers: This is a great activity to build on a child’s creativity and love for colors. There are plenty of dot marker worksheets online, but why not foster that creativity by painting together? Model creating a dot marker rainbow and see how your child follows your lead. What creative ways can they build the parts of their picture using circle shaped paint markers? You could also put stickers on a paper and see if the child can “catch” the sticker in a “bubble” with the marker. This helps develop the visual and coordination skills needed for writing – and it’s fun!
Pinching Activities: Speaking of stickers, this is a great fine motor activity to build those foundational writing skills. Using the first two to three fingers in isolation to peel stickers from a page and placing them somewhere is wonderful to facilitate grasping skills for holding writing utensils. This also fosters coordination of both hands as well as hand eye coordination – both of which are important to holding a paper and writing on it simultaneously. You can challenge your little one by using clothespins and placing them on a string or piece of paper. Perhaps you can give an animal you drew clothespin legs!
My child can’t keep letters between the lines!
This is a common issue and, depending on your child’s age, is developmentally appropriate. My first line of defense for a child that has significant difficulty with this – outside the developmental norm – is to use consistent line sizes. There are millions of worksheets and papers out in the works, and often they have varying line thickness, spacing, or other formatting inconsistencies. The constant changes can make it difficult to find consistency in letter sizing, therefore shifting placement to under/over provided lines.
Colors are your friend. Some children benefit from visual supports. You can highlight the top line blue for the “sky” and the bottom line green to represent “grass”. This gives the child visual cues to adapt their letter sizing to fit the margin provided. Try our grass and sky visual here!
Bump, bump, bump the line! This is one of my favorite tips, especially for kiddos that need more than just visual feedback. It does take some prep, but is totally worth it! Use a hot glue gun to trace over lines/boundaries that your child will be writing on. When this dries, they will have a nice “bumper” to run into when writing/drawing/coloring. Providing this feedback can bring attention to the physical space and eventually be weaned out once your child is more independent and can predict where the line or “bump” would occur. This can be used for little pre-writers and developing writers alike!
My child hates writing, they just refuse!
Make it fun! Research shows that children learn through PLAY! The more interested and engaged they are in the activity, the more they will learn and actually RETAIN. For younger kids – don’t be afraid to bring a game! Have your child write down each player’s name and keep score! Have them write out a “Winner’s Declaration” to announce who won the game! For your older children, what special interests do they have? Can you make a TRAIN FACTS book? What about a poster with all things insects or dinosaurs – whatever your child loves! Take turns writing one sentence to write a wacky story. Research as many “Dad Jokes” as you can and have people vote on the best ones! The possibilities are endless! The key is to get your kids bought in. You can thank me later.
I hope these tips and tricks help! Please feel free to download some fun writing templates for Santa, service people, and more by clicking here! You can also download our envelope folding tutorial here to facilitate fine motor and visual motor skills needed for handwriting!
Remember, make it fun and get in on the action! If you find that your child is continuing to struggle with writing skills, it is worth your time to at least get them evaluated by an occupational therapist. There could be underlying visual motor, sensory, or coordination difficulties that are inhibiting their ability to be successful in that area. Occupational therapy can evaluate those areas and provide an individualized plan to help your child.
Caitlin Sanschagrin, M.S., OTR/L
One of the most common questions asked by parents, especially around the holidays, is what kind of games should they buy for home to support what we are addressing in occupational therapy. With the holidays rolling in, I thought it might be helpful to share with you my favorite games in different categories. This post will be focusing on games that help develop or promote gross motor skills. For those of you that don’t know, gross motor skills are essentially the big movements we make with our bodies. Think jumping jacks, using two hands together, hand eye coordination, etc. All of these games can be adapted to an appropriate developmental or skill level of the players. Therapists use adaptations and modifications all of the time and we call it “grading”. So we can downgrade the task to make it simpler or upgrade it to make it more complex. In addition to the game suggestions, I will also suggest a modification so that you can downgrade the games at home as needed.
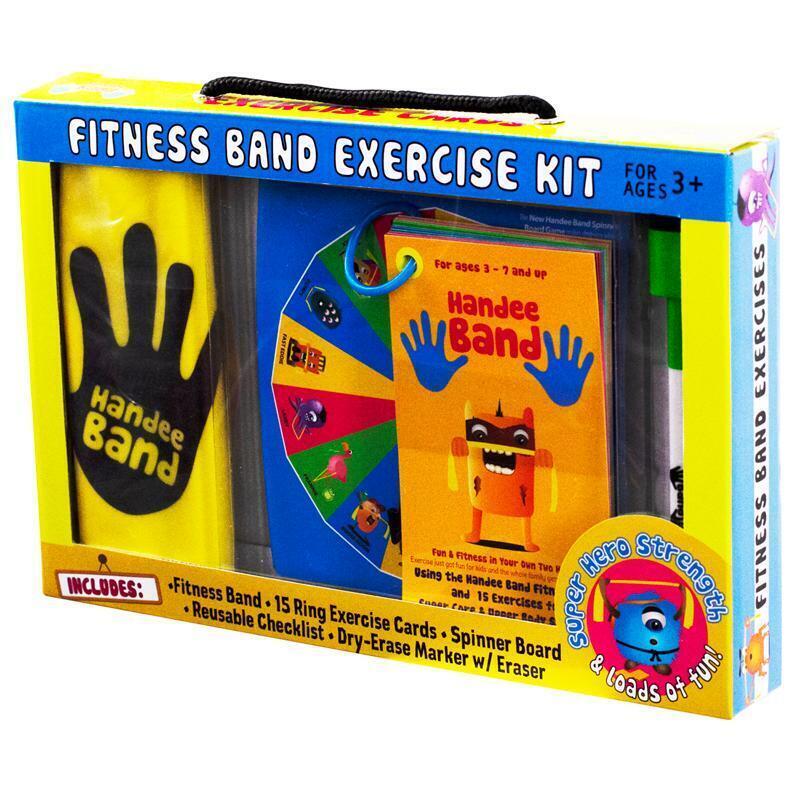
Handee Band
This game comes with a resistive band with visual markers of where hands should be placed to hold the band. It also comes with a spinner to see which character you land on. Each character has a corresponding exercise that is explained further in the booklet. This game is great for upper body strengthening, body awareness, and coordination skills.
You can downgrade each exercise by performing the exercise first and then having your kiddo copy you!
Yogarrr!
A yoga game with a pirate twist! There are various cards with yoga poses you must copy – but they each have a picture of where the parrot should be placed on your body while in your yoga position. Don’t drop the parrot! This is great for motor planning, body awareness, coordination, and even impulse control (you have to manage your body in order for the parrot to stay in place)!
You can downgrade the game by helping kiddo get into position and then placing the parrot on a stable spot for them.


Zoom Ball
This classic toy is quick, simple, and great for many different skills. Bilateral coordination, upper body/shoulder strength, hand eye coordination, motor planning, rhythm, and even muscle force gradation! This is also good practice for moving eyes in and apart (called convergence and divergence). Imitate different animals like alligator chomps (alternating which hands are on top) or bird wings. Choose different places to stand like tall kneeling or one leg.
You can downgrade this by you being lower than your child which compensates for strength and coordination difficulties.
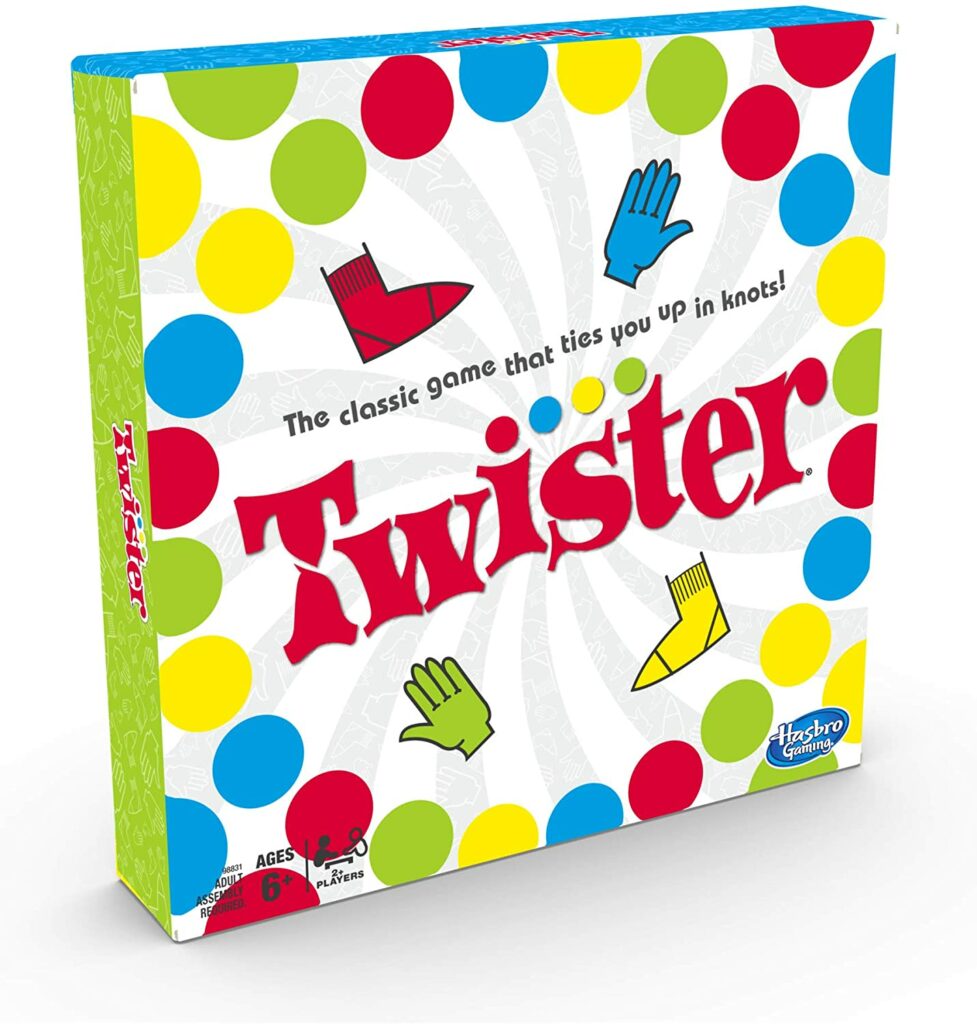
Twister
A classic game that most have in their gaming repertoire. This game is great for motor planning and coordination. It is HUGE for body awareness, proprioception, and left/right discrimination. Since you have to maintain your stance while playing, it also improves upper body and core strength which helps support fine motor skills as well. You can always “twist” the game up by using other body parts (ex. elbow, knee, head) or even speeding up the play with a lightning round!
Downgrades can be as simple as breaking down the task. For example, “Where is your right hand? Ok, place that on yellow!”. You could also give specific directions to assist with motor planning/moving their body in order to be successful. You can join in on the fun and model each turn as well.
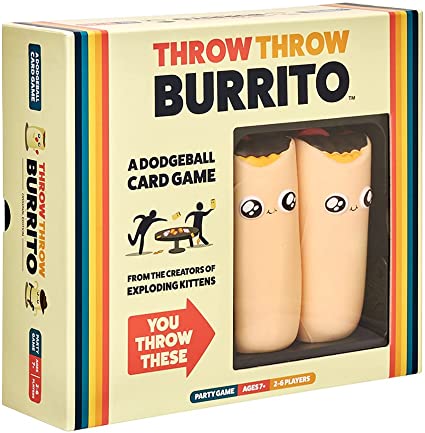
Throw Throw Burrito
A creative game for you hand eye coordination and body awareness skills! This card game is a fast paced matching game with burrito throwing fun! Dodging the burritos includes motor planning and body awareness while throwing burritos includes hand eye coordination, muscle force gradation. bilateral coordination, as well as motor planning and body awareness!
Downgrade this game by designating matching times and burrito throwing times so that full focus can be on each respective task with less chaos for younger kiddos.
Hot Potato
A gross motor game for your younger kids is the classic Hot Potato! Just like in the old school game in which you toss the potato around until someone yells STOP – this hot potato plays music. While the music plays, players toss the potato frantically to the next player. Whoever is holding the potato when the music stops is out! This game helps with hand eye coordination, bilateral coordination, trunk rotation (assuming you’re tossing it around a circle of participants), and muscle force gradation. Not to mention the added benefit of auditory discrimination by focusing on the music and the motor task of throwing!
You can downgrade this simple game by giving a visual or verbal cue once the music stops to help kiddos understanding that the tossing is paused. You can sit while tossing rather than standing and you could also be closer together for tossing or even roll to participants based on skill level.

Our hope is that this post gives you ideas for gifts or even fresh ways to play with games you already have! Ask your occupational therapist for specific recommendations for your child and family.
-Caitlin Sanschagrin, MS, OTR/L
Is my kiddo just picky or do they need feeding therapy?
Below are some tips for picky eaters. If you feel stuck or like everything you try is in vain, reach out to your local occupational or speech therapist to discuss if feeding therapy is appropriate.
Picky eating, ARFID, Pediatric Feeding Disorder… there are many names used to describe difficulties with eating for children. For any parent, this can be an overwhelming issue. With meals and snacks occurring 3-5+ times a day, it’s no wonder that parents become overwhelmed! I want to provide you some ideas for your toolbox to help manage the overwhelm. These general tips are not meant to replace the guidance of your pediatrician or feeding therapist.
***Before walking through these tips, I’d like to start with an important caveat. Never, never, never force your child to eat. That means no holding broccoli in front of their faces until they accept, no standing behind them and sneaking a scoop into their mouths, no hand over hand to force food into the mouth, no demanding that your child stay at the table until they eat a certain food, and no punishments for not eating. Additionally, I do not recommend hiding things in their food. Even if you get away with it for a while, in the end this will create a more hyper vigilante child with more anxiety around eating. I say this without judgment. I know parents end up trying desperate things to get their child to eat and that this is borne out of concern for their well-being. However, these methods will only backfire long-term. Our goal should be positive relationships and experiences built around mealtimes. The tips below are an effort to help you do this. However, if things start to feel desperate or your caregiver/dad/mom-gut is telling you something isn’t right, talk to your pediatrician and ask about your child being evaluated by a feeding therapist (often speech language pathologists or occupational therapists).
Slow down, take a breath. If you’ve found this post then you are likely feeling stressed, worried, and/or at your wit’s end with finding foods for your little one to consistently eat. That’s understandable! However, this can often be palpable and add stress to the mealtime for both you and your kiddo. Not only is that unpleasant for all involved, but the stress response releases a hormone called epinephrine (also known as adrenaline) which is an appetite suppressant – see where I’m going with this? So my advice is to slow down and take a breath. You can even practice taking big belly breaths together! Try blowing bubbles at the table before you present food. Pretend to smell some beautiful flowers and then pretend to blow out birthday candles. You can help each other lower your heart rate and release endorphins (your “feel good” hormones)! What a great way to start a meal!
Recruit a sous chef. Give your kiddo developmentally appropriate jobs. Can they throw tomatoes into the salad bowl? What about stirring the pancake mix? This gives your kiddo more neutral or positive interactions and exposure to foods and their ingredients. Explain what the ingredients are and their changing properties as they are cooked. “The pasta started out crunchy but the hot water made it squishy!”. You can also explain what the different ingredients do and how they provide energy to our bodies. For example, proteins give our body energy for longer periods of time and starches give us energy for shorter periods of time. Proteins help us build strong muscles while vegetables help our bodies work better (like carrots keep our eyes healthy to see). Even setting the table can help your child feel a sense of predictable structure which helps with managing the transitions associated with mealtime.
Be a model. Kiddos love to imitate their parents! Use that to your advantage and show your kiddo what they can do with their food. You can also narrate your actions with food. “I’m going to have a small taste of this yogurt…the yogurt is cold and has a tart taste”, “I wonder what these carrots smell like…I’m going to sniff and find out…oh, they have a sweet smell! What do you think?!”. When you are chewing your food, make exaggerated chewing movements. Allow your kiddo to feed you (this is usually a huge hit!) or even take turns feeding a preferred toy.
Be mindful of your language. Instead of describing your food as “gross, yummy, good, or bad”, try describing the sensory properties. This helps children put facts with food and helps prevent internalizing negative feelings with food. Words like, squishy, crunchy, salty, juicy, smooth, purple, round, shiny, hard, big, small are good starting points!
Learning plate. Try serving meals “family style”. Everyone passes a dish and takes a serving. For foods that might be particularly difficult, place them on a saucer next to the dinner plate and designate it “the learning plate”. Explain that this is where the new foods go if they aren’t ready to eat it. Use the tip above to increase engagement and exposure!
Check kiddo’s seating situation. Good feeding skills start with good postural stability. Is your little one slouching or leaning to one side? Make sure your child is sitting upright and is not leaning left or right. Good posture ensures that the airway is in a safe position for swallowing. If maintaining this posture seems to be fatiguing for your child (pay attention to how they are breathing, does it seem more involved or faster-paced?), use towels to support them on either side. Eating is not the time to work on core strength – we need the muscles to focus on eating and breathing. Ensure that your kiddo’s feet are supported so that ankles, knees, and hips are at about 90 degrees. Also look at your child’s pelvis and make sure the pelvis is tilted more forward instead of backward with their booty scooted toward the back of the seat, all of which helps with the postural alignment. You can use towels, pool noodles, and even cardboard boxes to add support to any highchair or dinner chair! Consult your OT for specific suggestions for your kiddo’s proper postural alignment.
Play, play, play! Yes, PLAY with your food! Research shows that kids learn the best through play, but many of us forget that includes learning about food, too! Get goofy! Make green bean mustaches or pepperoni noses. Bite your biscuit and make it a crescent moon! Use fun utensils or small toys to engage with the foods. Use different animal licks: how does a lizard lick versus a puppy? Try chew challenges! Who can break the food into the smallest pieces or make the loudest crunchy sounds?! GET MESSY! Encourage your little one to engage in foods with their hands. Dump purees on the highchair table, let them splat and smear their hearts out! Encourage building structures or happy faces with foods. Tactile bins are great for sensory enrichment.
All in all, focus on building positive experiences with and around food. Change your mindset to increasing exposure to different foods rather than focusing on what actually goes in their mouth. Research indicates that on average, it can take a kiddo up to 10 times of tasting a new food before they will eat it consistently. Hopefully knowing this, in addition to the above tips, will ease some of the overwhelm related to “picky eating”. Remember to continue to take care of yourself, too. And if you need more answers, never hesitate to ask your child’s pediatrician. You know your child best!
Caitlin Sanschagrin, M.S., OTR/L
“Homework oh homework, I hate you, you stink!” Throughout elementary and middle school, my principal started every year by reading this Shel Silverstein poem, while all of us students shouted along enthusiastically.
Homework has always been a pain in the neck for kids- and parents. I can specifically recall instances throughout my childhood and adolescence when my poor parents stayed up with me to finish assignments. These were almost always art projects, or assignments that required any sort of creativity. A mobile for my sophomore year English class? Disaster. A coloring page at the age of 7? Impossible. (But give me a paper to write, and I was there!)
Given that homework can feel like a major burden for students and their parents, I wanted to provide a few tips and share a few thoughts that might make the process a little more positive.
First of all, think of how you feel after a long day of work. Some nights, the last thing I want to do is open my computer to finish my last few notes from the day. (Fact check: True). Those nights, I definitely have to set myself up for success right from the start. One of the first things I do is set up my area. I make sure my counter is clear, gather all necessary paperwork and my laptop, climb up onto one of my kitchen stools, and get started. This is my “focus spot”, and once I’m there I know what I have to do- put down the phone, and turn off the TV. If I’m in the mood for background music, it has to be unfamiliar and instrumental only (otherwise, I’m immediately singing along!). I suppose this first tip is really just- know yourself. Some students need background noise to study, others need absolute silence. Help your child figure out how they study best. Have them help you choose and set up their homework space (preferably NOT in their bedroom where distractions are endless). If possible, use a “homework only” designated space. Good lighting is key, as is the removal of distractions. Also make sure that necessary supplies are in this space, so your child does not have to keep venturing out to get them.
On days when my focus is lacking, I have also found it beneficial to set a “work timer”. Sometimes I set it for as little as 15 minutes, and work solidly until the timer goes off. At that point, I can take a quick break if needed, or reset my timer and get back to work. Nine times out of ten, I’m able to simply keep working. My personal difficulty oftentimes is task initiation, or actually getting started. The use of a timer definitely helps me to get rolling. Side note- if your child does want a break, make sure to set a “break timer” too! Preferably, these breaks can be a quick chat with you, a snack, or something involving movement. YouTube breaks make it a bit more difficult to jump back into homework when the timer goes off!
An afterschool written schedule can also help. When possible, have a designated homework time. Discuss expectations and how your child can earn possible rewards.
How much homework time is too much each night? A general guideline is as follows:
– 20-30 min max (5-7 years)
– 1 hour max without assistance (8-11)
– Two hours (High school)
It’s important to remember that if your child has any special needs, homework may take longer than his or her teacher is expecting. It’s always a good idea to keep the line of communication open so that everyone is on the same page. It is acceptable to request modifications for homework assignments (ex: 10 math problems instead of 20) if homework is taking significantly longer than posted above.
Remember- school is essentially your child’s job. Their brains are hard at work all day, and what they are able to accomplish at home is different for each child.
Emily Rooker, M.S., CCC-SLP